
Quick Summary
-
Crash 300 & Boom 300 are fast-moving synthetic indices designed for short-term trading.
-
Best traded on Deriv MT5 using tight risk control and precise entries.
-
Scalping and momentum strategies work best on M1–M5 timeframes.
-
Risk management matters more than indicators on these indices.
-
You can speed up learning and execution with tools like Bry Trader Assistant.
Introduction
Crash and Boom 300 are some of the most popular high-volatility instruments on Deriv—and for good reason. With frequent spikes and clean price action, they offer daily trading opportunities for disciplined traders.
In this guide, you’ll learn how to trade Crash and Boom 300 on Deriv MT5, including market behavior, best strategies, indicators, lot sizing, and common mistakes—so you can trade them with structure, not guesswork.
What Are Crash and Boom 300 Indices?
Crash and Boom indices are synthetic markets offered exclusively by Deriv. They are not affected by news or real-world events.
Key Characteristics
-
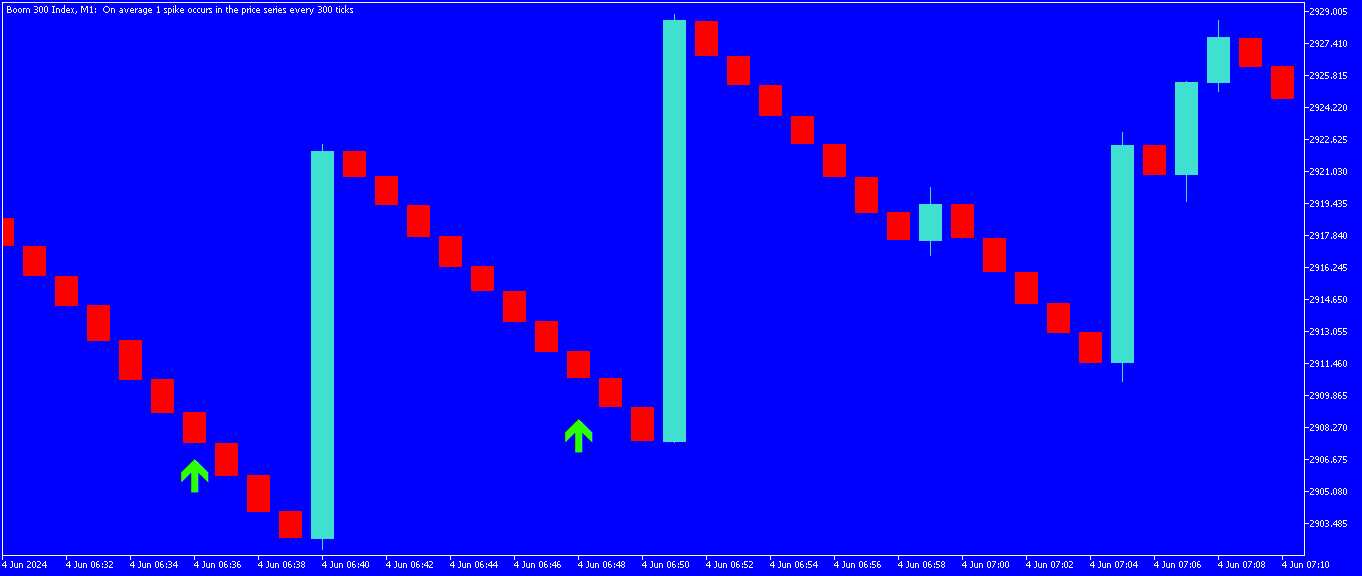
Boom 300: Frequent upward spikes, rare sudden drops
-
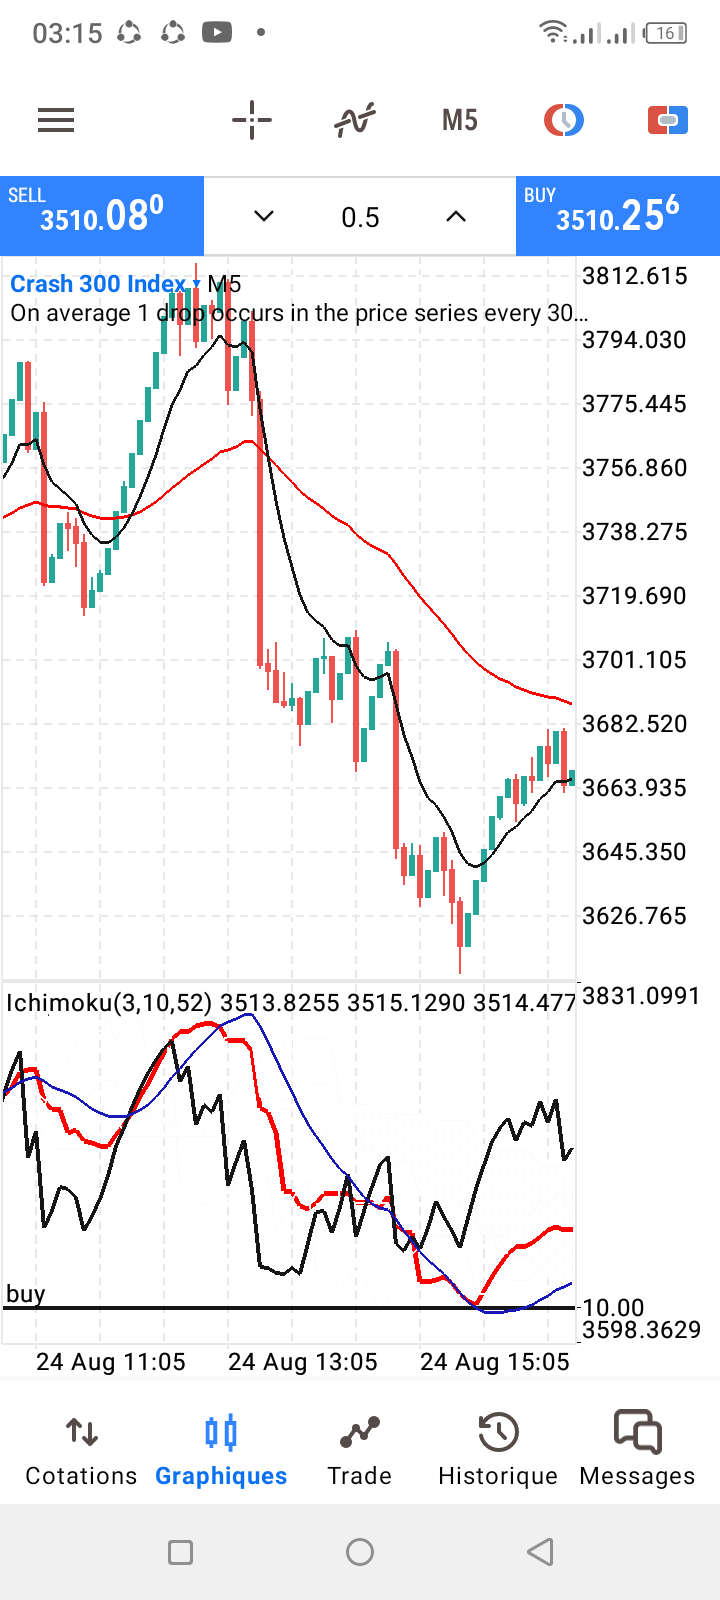
Crash 300: Frequent downward spikes, rare sudden jumps
-
Average of 1 spike every ~300 ticks
-
Available 24/7, including weekends
This makes them ideal for technical traders who prefer predictable volatility.

How to Access Crash and Boom 300 on Deriv MT5
Step-by-Step
-
Create or log into your Deriv account
-
Download MetaTrader 5
-
Log in using your Deriv MT5 synthetic account
-
Open Market Watch
-
Navigate to Synthetic Indices
-
Select Boom 300 Index or Crash 300 Index
Best Timeframes to Trade Crash & Boom 300
These indices are not swing-friendly for most traders.
Recommended Timeframes
-
M1 – aggressive scalping
-
M5 – controlled scalping (best for beginners)
-
M15 – selective entries only
Avoid H1 and above unless you are highly experienced.
Proven Trading Strategies for Crash & Boom 300
1. Trend + Spike Avoidance Strategy
This is the safest approach.
Rules:
-
Trade Boom 300 buys only
-
Trade Crash 300 sells only
-
Enter after a spike, not before
-
Use EMA 50 & EMA 200 for trend confirmation
✔ Trade with momentum
✖ Never trade into a spike
2. Support & Resistance Scalping
Crash and Boom respect key price levels extremely well.
How it works:
-
Mark recent highs/lows on M5
-
Wait for price rejection
-
Enter with small stop-loss
-
Target 5–20 points
Best combined with RSI (14) for confirmation.
3. Spike Recovery Strategy (Advanced)
Used by experienced traders only.
-
Wait for a large spike
-
Enter in the opposite direction
-
Use very small lot sizes
-
Exit quickly (scalp only)
⚠ High risk if poorly timed.


Best Indicators for Crash & Boom 300
Keep it simple.
Recommended Setup
-
EMA 50
-
EMA 200
-
RSI (14)
-
Price Action (key!)
Avoid overloading charts—clarity beats complexity.
Lot Size & Risk Management (Critical)
Most blown accounts fail here.
Safe Risk Rules
-
Risk 1–2% per trade
-
Use smaller lot sizes than Forex
-
Always set a stop-loss
-
Avoid revenge trading after spikes
Example (Beginner):
-
Balance: $100
-
Lot size: 0.20 – 0.50
-
SL: tight, based on structure
Common Mistakes Traders Make
-
Trading before spikes
-
Overleveraging
-
Ignoring trend direction
-
Holding trades during spike zones
-
No trading plan
Crash and Boom punish emotional trading instantly.
Tools That Make Trading Easier
Manual trading works—but smart tools accelerate consistency.
Bry Trader Assistant
If you want help with:
-
Trade discipline
-
Strategy execution
-
Risk control
-
Trade planning
👉 Use Bry Trader Assistant:
🔗 https://bry-trader-assistant.web.app/
It’s especially useful for traders learning Crash & Boom structure on MT5.
Final Takeaway
Crash and Boom 300 can be very profitable—but only for traders who respect risk, timing, and discipline.
Success Formula
-
Trade with the trend
-
Avoid spike guessing
-
Use tight risk control
-
Keep strategies simple
-
Use tools that reinforce discipline
Master those, and Crash & Boom 300 on Deriv MT5 can become a consistent trading opportunity, not a gamble.